
To start your WordPress website design from scratch, the first step is to register a domain name and acquire web hosting. A domain name is the address of your website on the internet, and web hosting is the service that allows your website to be accessible online.
Now that:
- You’ve taken the crucial and most challenging step, the first step, in starting your business
- You recognize and understand the need and importance to build an effective website
- You know the key elements and considerations before building it
- You’ve explored the top options to achieve this and realized that starting strong with the best free website builder, WordPress, is a great idea…
It’s time to work hard to build and launch your first amazing website from scratch. Let’s get to work!
WordPress Website Design - Build and Launch Your First Spectacular Website from Scratch
Embarking on the journey of creating your first website is an exciting and essential step in establishing your online presence. With WordPress, one of the most powerful and flexible content management systems (CMS) available, you can build and launch a truly impressive website from scratch. This guide will walk you through the entire process, ensuring that you take advantage of the full potential of WordPress to build a website that not only looks great but also performs exceptionally well.
What is WordPress ?
WordPress is an open-source content management system (CMS) that, speaking of numbers, according to W3Techs, is currently used by 64.1% of all websites that use a content management system to function, and 42.9% of all websites in the world are made in WordPress.
Its popularity stems from its ease of use, extensive customization options, and a vibrant community of developers and users. WordPress offers a vast library of themes and plugins that allow you to customize your Website to your specific needs, whether you’re building a Blog, an e-commerce store, a portfolio, or a business website.
Choosing a Domain Name and Hosting Provider
The first step in creating your WordPress website is selecting a domain name and a hosting provider. Your domain name is your website’s address on the internet (e.g., www.yourwebsite.com), and your hosting provider stores your website’s files and makes them accessible to visitors. Popular hosting providers for WordPress include Hostinger, SiteGround, Bluehost, Hostgator and GoDaddy among others, many of which offer one-click WordPress installation and specialized WordPress hosting plans.
Installing WordPress
Once you’ve chosen your domain name and hosting provider, you’ll need to install WordPress. Most hosting providers offer a simple, one-click installation process. If your provider does not offer this (which really is unlikely), you can manually download WordPress from wordpress.org and upload it to your hosting server via FTP(File Transfer Protocol). Follow the installation instructions to set up your database and configure your site.
As we already mentioned, there are many domain registrars and web hosting providers available. Choose a reputable provider that suits your needs and budget. Follow their instructions to register a domain name and purchase a hosting plan. Make sure to keep your login credentials safe as you will need them later.


Installing WordPress from the Control Panel
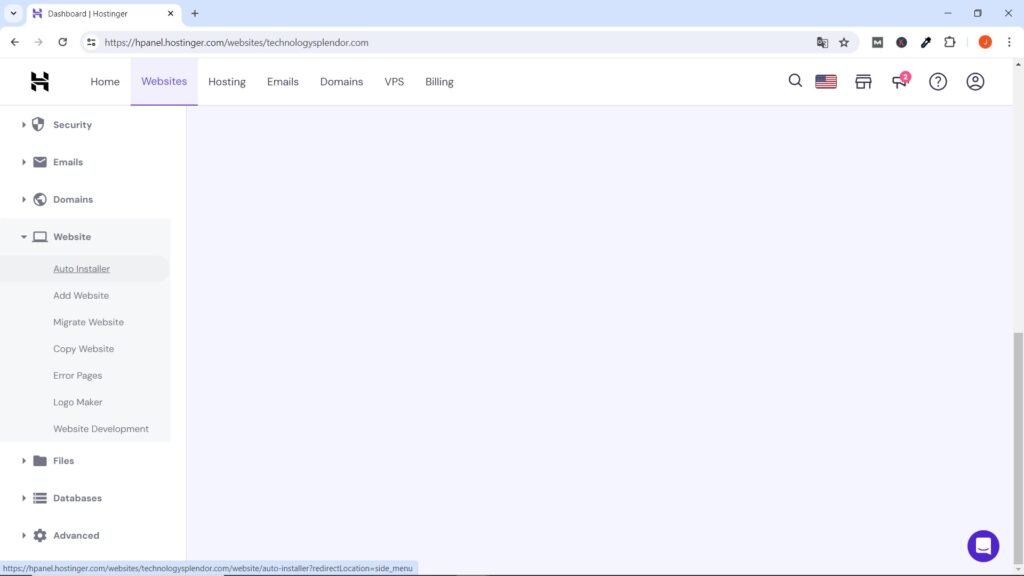
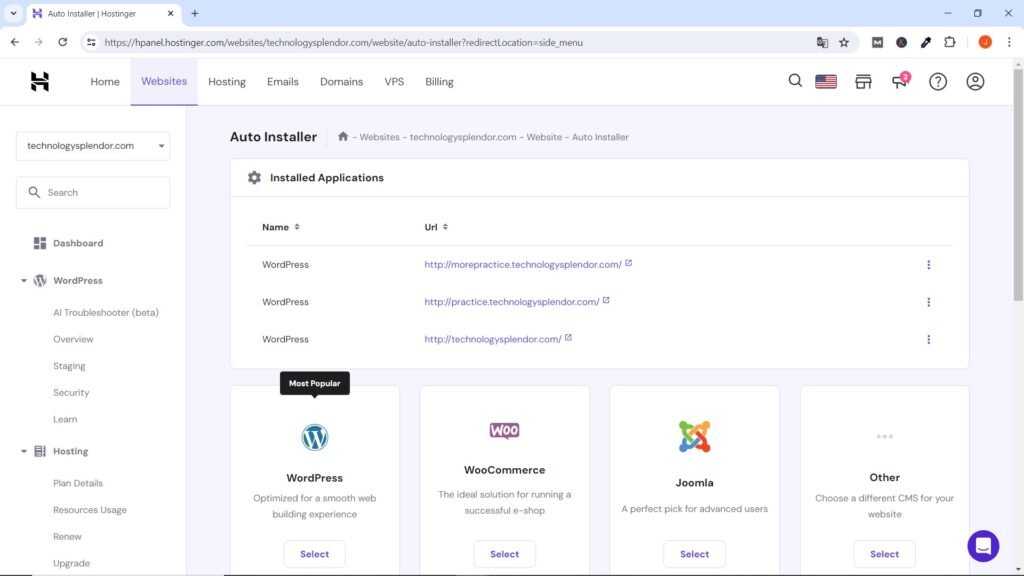
Once you have acquired web hosting, you will need to install WordPress. Most web hosting providers offer a one-click installation option through their control panel (often called cPanel).
Login to your hosting account’s control panel and look for the WordPress installation option. Click on it and follow the instructions to install WordPress on your domain. You will need to provide some basic information such as the domain name, username, and password for your WordPress admin account.
Below we show you a screenshot of how wordpress is installed from the Hostinger cPanel, but don’t worry if you didn’t choose this web hosting provider since in all the others practically the same thing is done, only the appearance of the screen changes.
Configuring WordPress
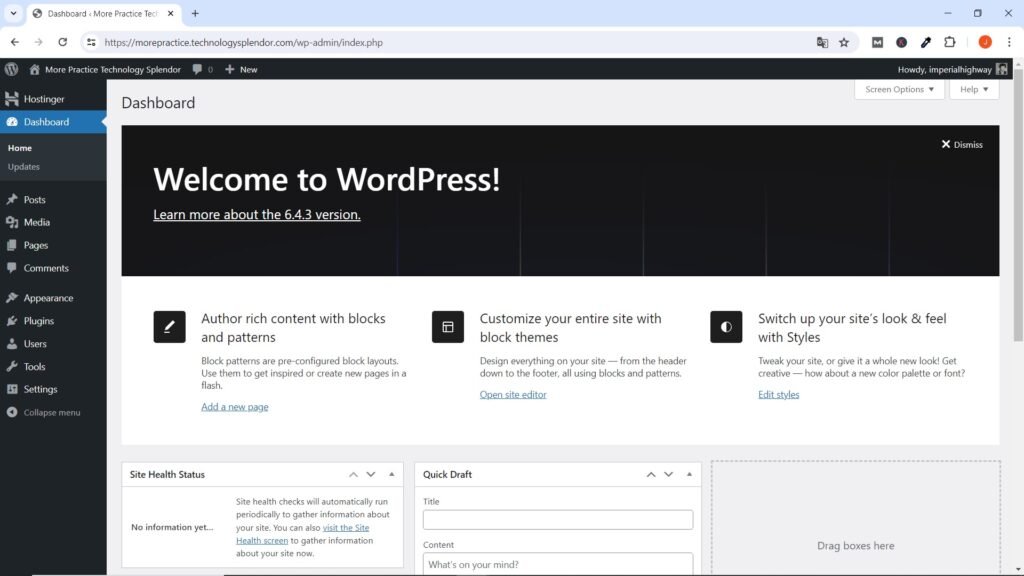
After installing WordPress, you can access your website’s admin area by adding “/wp-admin” to your domain name (e.g., www.yourwebsite.com/wp-admin). Use the username and password you set during the installation process to log in.
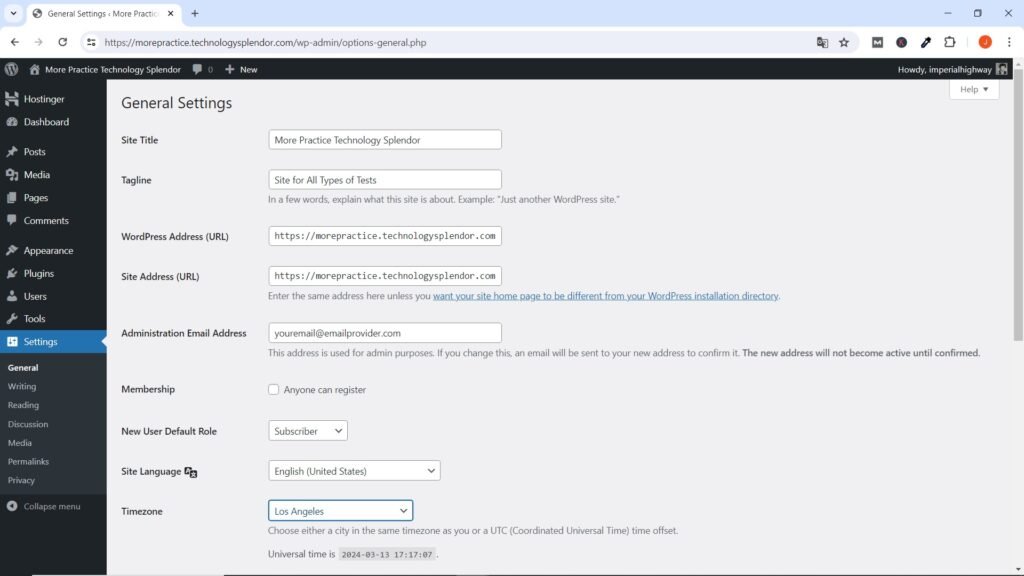
Once logged in, you can configure various settings for your WordPress website. Go to the “Settings” menu in the admin dashboard and review the general settings, such as website title, tagline, and timezone. Customize these settings according to your preferences.
Choosing and Installing a WordPress Theme and the Essential Plugins
Next, it’s time to choose a theme for your website design. WordPress offers a wide range of free and premium themes that determine the design and layout of your website. You can browse through the available themes in the “Appearance” menu and install the one that suits your website’s purpose and style.
Themes and Templates
A theme in WordPress is like the overall design and style of your entire website. It’s like the clothes your website wears. It determines the look of your website, including things like colors, fonts, layout, and where elements are placed.
A template is like a blueprint or pattern just for a specific part of your website. It is a pre-designed layout for individual pages or sections of your site, such as your home page, blog posts, or contact page. Templates make it easy to create consistent-looking pages without having to design each one from scratch.
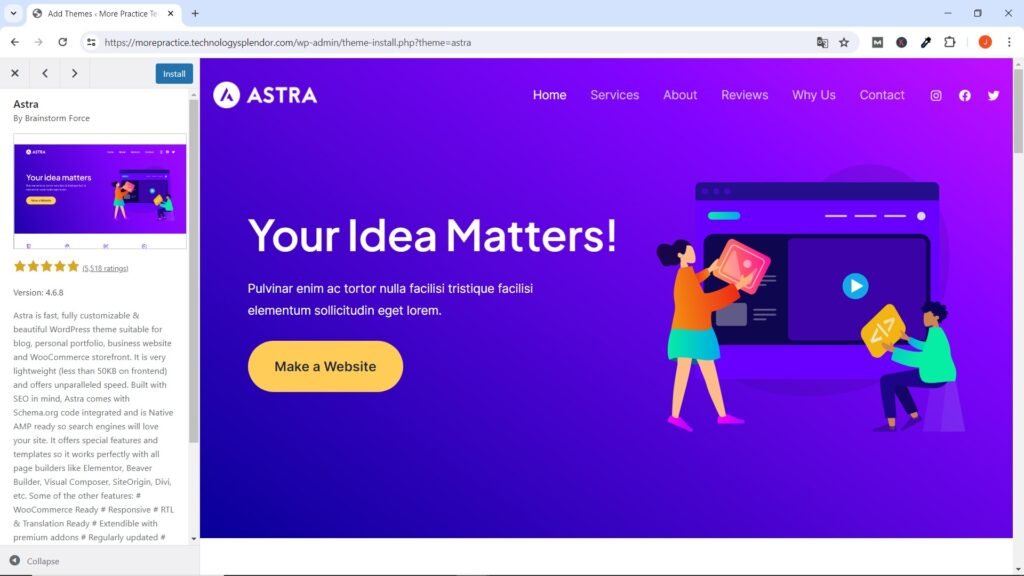
To start, a highly recommended theme for website design is one called Astra. The Astra WordPress theme has gained popularity and become one of the most used themes for several reasons.
Overall, the combination of performance, flexibility, accessibility, support, compatibility, and community involvement has contributed to the widespread adoption and popularity of Astra among WordPress users. Additionally, Astra provides a library of Starter Templates covering various industries and niches, making it easy for users to get started with a professional website design. These templates serve as a solid foundation that can be customized to match individual preferences and branding.
Installing a Theme
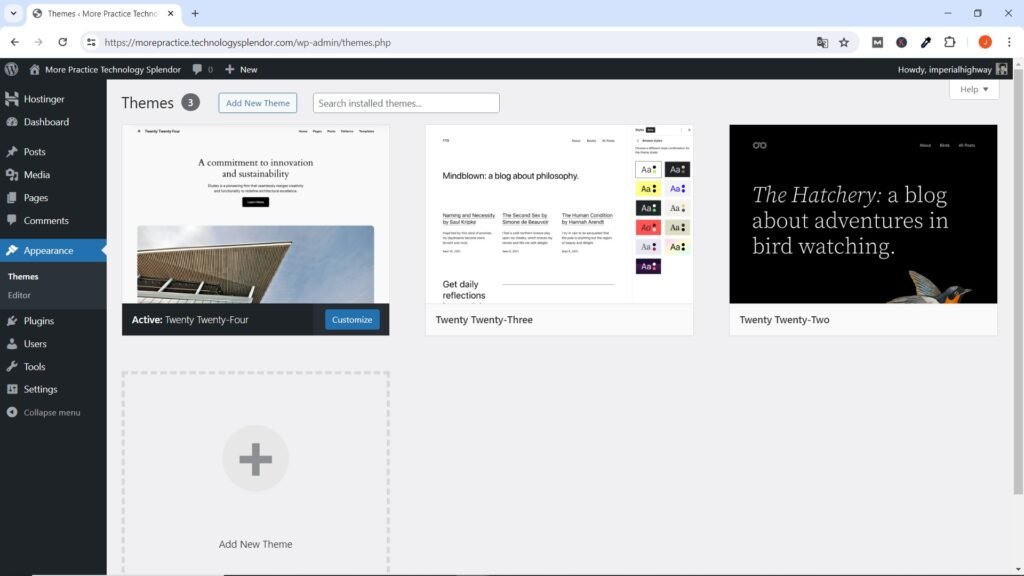
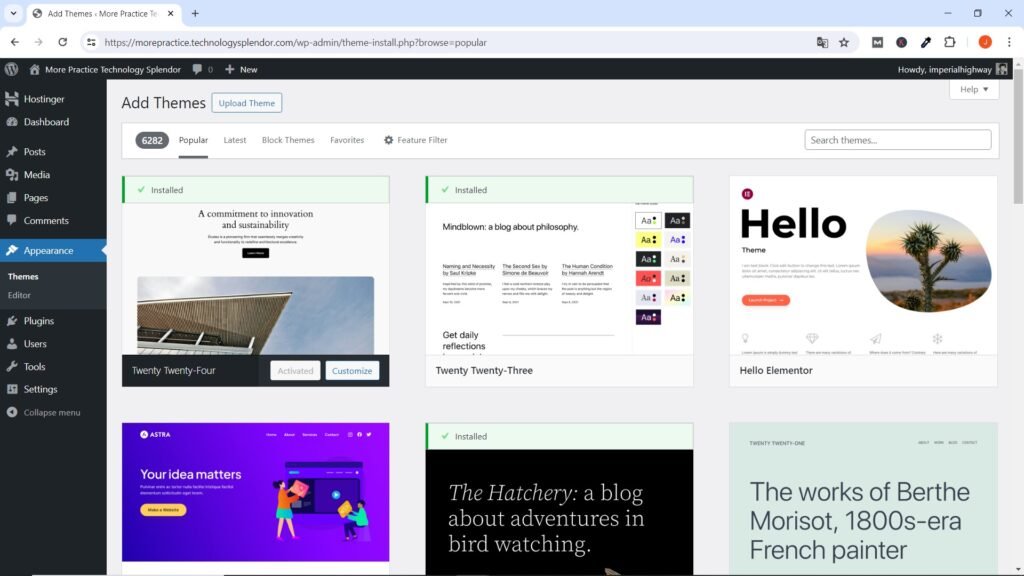
To install a new theme, like Astra in this case, you just have to click on Add New Theme in the Appearance Menu of the WordPress Dashboard. If the WordPress theme you are looking for does not appear on the screen, you just have to write its name (Astra in this case) in the search bar, then install it, activate it and that’s it!
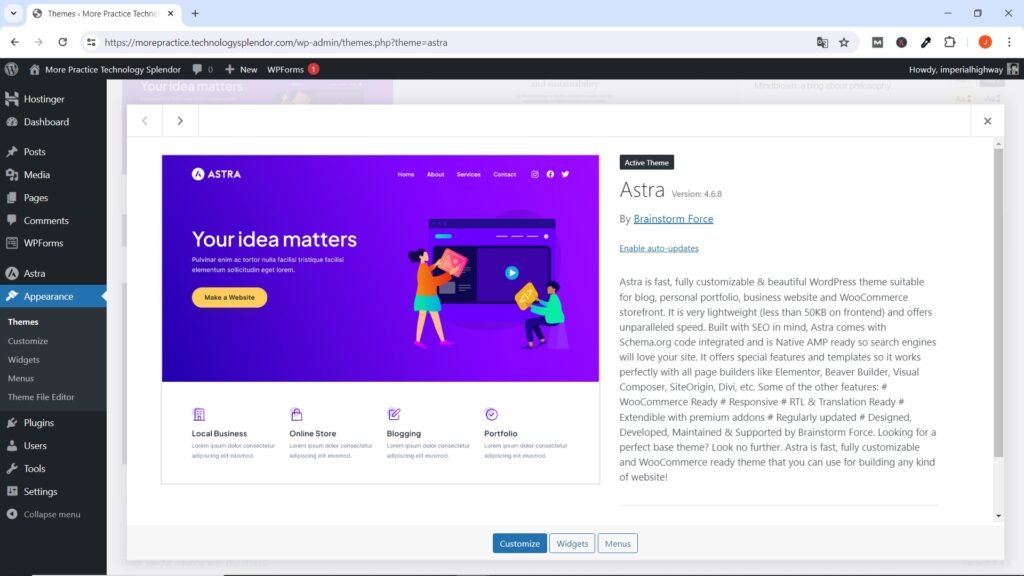
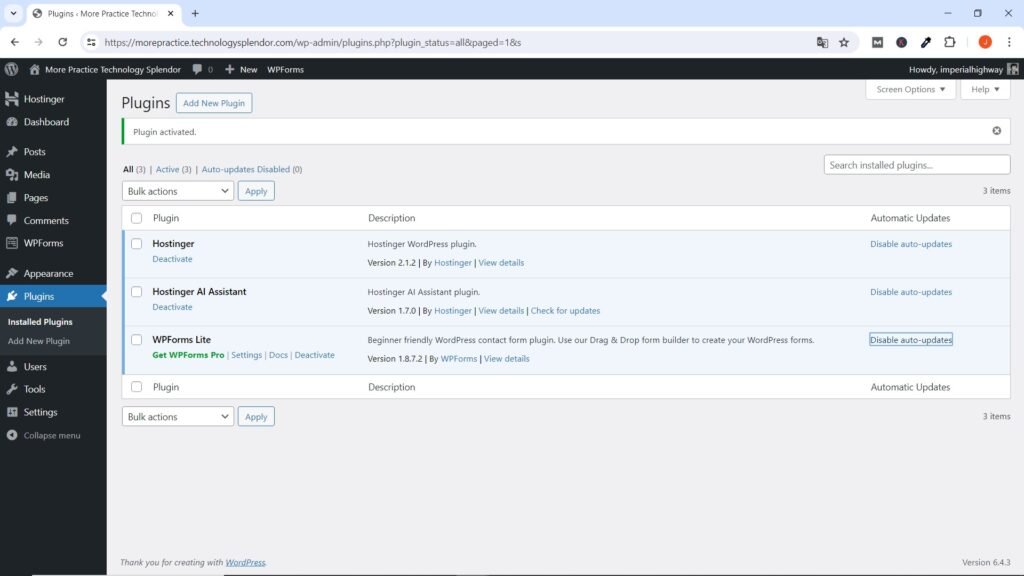
Immediately after installing and activating the Theme, make sure to Enable Automatic Updates by going to Appearance →Themes, clicking on the small image of it and then on the Enable auto-updates option.
You can click on each of the themes that appear installed but not active, and delete them.
WordPress Themes: Essentials and Popular Choices
WordPress themes are essential for defining the design and layout of your site. Below we show the most popular themes that are widely used due to their customization options, performance and compatibility.
Choosing the right theme depends on your site’s purpose, customization needs, performance requirements, plugin support, and the level of support and updates provided:
Astra: Known for its lightweight design and speed, Astra is highly customizable and compatible with major page builders like Elementor and Beaver Builder.
Divi: Comes with a powerful visual builder and a vast library of pre-made templates, making it ideal for users who want extensive design flexibility.
OceanWP: Offers a wide range of features and extensions, making it perfect for a variety of website types, from e-commerce to blogs and business sites.
GeneratePress: Lightweight and performance-focused, GeneratePress is highly customizable and integrates well with most plugins and page builders.
Neve: Designed for speed and flexibility, Neve is fully customizable and works seamlessly with popular page builders and WooCommerce.
Plugins
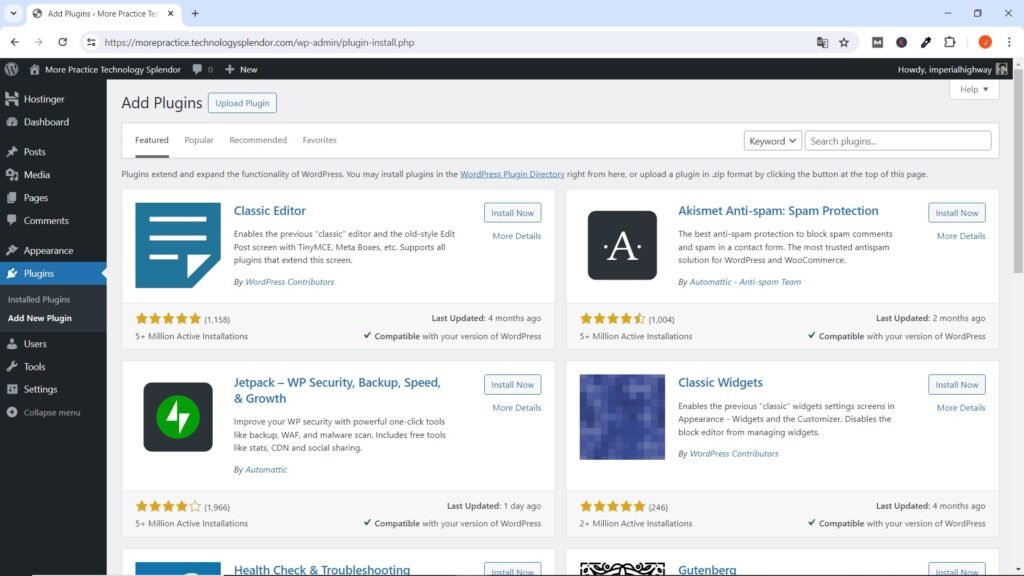
Plugins are add-ons that extend the functionality of your WordPress site. The WordPress Plugin Directory offers thousands of free plugins for various purposes, including SEO, security, performance optimization, and more.
In addition to the theme, you may want to install the first essential plugins to improve the functionality of your website. Some popular plugins include Yoast SEO for search engine optimization and WPForms Lite for creating contact forms.
Installing a Plugin
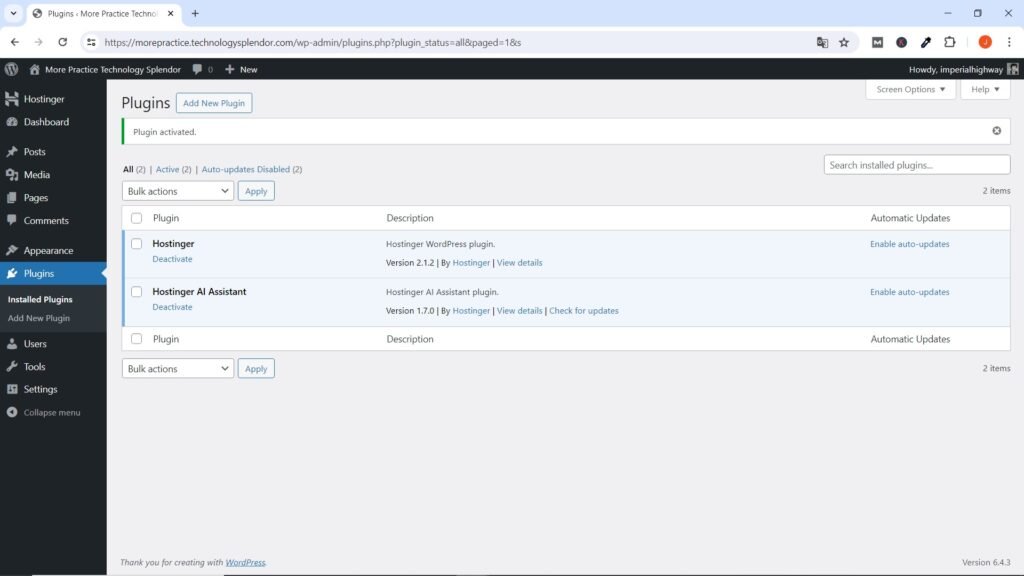
The process to search for, install and activate a plugin is similar to the case of themes, obviously in the Plugins Menu of the WordPress Dashboard. Navigate to the “Plugins” section in your dashboard, click “Add New,” and search for the desired plugin. Once installed, activate the plugin and configure its settings. Install and activate plugins that are relevant to your website needs. As you progress in your project you will realize if you need more plugins.
One of the first and most essential plugins when starting website design is WP Form Lite in order to create the Contact Page of the website. As with the Theme and immediately after installing and activating each Plugin, make sure to Enable Automatic Updates for it by clicking on the option on the right side of the plugin information.
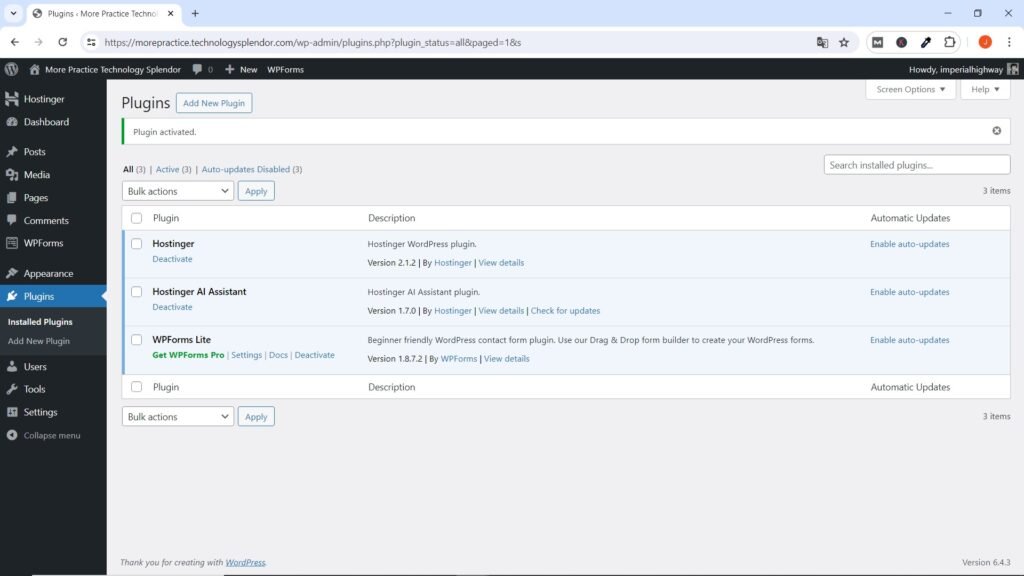
Essential Plugins for Your Website
- Elementor: Elementor is one of the most powerful and widely used WordPress plugins. It is a drag and release pages builder that provides an intuitive and easy to use interface, whether you are a beginner or an experienced developer. Elementor offers the necessary tools and flexibility to create spectacular and functional websites.
- Yoast SEO: Yoast SEO improves your site’s SEO by providing tools and recommendations for optimizing your content.
- Wordfence Security: Protects your site from malware and other security threats.
- Lite Speed Cache: The LiteSpeed Cache plugin is a powerful caching and optimization tool for WordPress. It is designed to significantly to improve the performance and speed of WordPress websites by implementing various caching mechanisms, optimizing resources, and reducing load times. This leads to a better user experience and can positively impact SEO rankings.
- WPForms Lite: Ideal for users who need basic forms like Contact Forms, feedback forms, or simple surveys.
- UpdraftPlus: Provides reliable backup and restoration options for your WordPress site, allowing you to schedule automatic backups to cloud storage.
- WooCommerce: Transforms your WordPress site into a fully functional e-commerce platform, allowing you to sell products and services online.
- Smush: Optimizes images to reduce file size without losing quality, improving site speed and performance.
Additional Plugins
Obviously it is impossible to show and describe each of the thousands of plugins for WordPress websites. Below we present a few more that you may use depending on the requirements of your website:
Jetpack: Offers a suite of features including security, performance optimization, content tools, and visitor engagement features.
Akismet Anti-Spam: Automatically filters out spam comments, keeping your site clean and free from unwanted content.
WP Super Cache: Improves site performance by generating static HTML files from your dynamic WordPress site, reducing load times for visitors.
Contact Form 7: Enables you to create and manage multiple contact forms, customize form fields, and use CAPTCHA for spam protection.
MonsterInsights: Integrates Google Analytics with your WordPress site, providing detailed insights into visitor behavior and site performance
WPForms: A user-friendly form builder that allows you to create various types of forms including contact forms, surveys, and payment forms.
Redirection: Manages 301 redirects and tracks 404 errors to improve site SEO and user experience by redirecting broken or outdated URLs.
W3 Total Cache: Enhances site performance by caching pages, database objects, and browser caching, reducing load times and improving user experience.
Broken Link Checker: Scans your site for broken links and missing images, helping you maintain a clean and functional website with all links working correctly.
WordPress Pages and Posts
When it comes to building a website on WordPress, two key elements that you will encounter are pages and posts. Understanding the differences between these two components is essential for creating and managing your website effectively. We will delve into what pages and posts are, their purposes, and the key distinctions between them. Understanding the differences between pages and posts helps WordPress website owners effectively organize and present their content to visitors.
What are Pages?
In WordPress, pages are static, standalone pieces of content that are typically used for timeless information on your website. Pages are meant to provide information that remains relevant over time, such as a Home page, About Us page, Contact page, or Blog page. They are usually included in the main navigation menu of your website and are easily accessible to visitors.
What are Posts?
On the other hand, posts are dynamic pieces of content that are displayed in reverse chronological order on your website. They are typically used for time-sensitive information, such as blog articles, news updates, or event announcements. Posts are often categorized and tagged to help organize and filter content based on specific topics or themes.
Unlike pages, posts are not included in the main navigation menu by default. Instead, they are typically displayed on the blog page or any other designated page that serves as the blog index. Visitors can access posts by clicking on the blog page or through links in other posts.
Differences between WordPress Pages and Posts
Now that we have a basic understanding of what pages and posts are, let’s explore the key differences between them:
Purpose and Structure
Pages are best suited for static content that doesn’t require frequent updates. They are commonly used for essential information like the homepage, about us, contact, and services pages. On the other hand, posts are designed for regularly updated content, such as blog articles, news updates, or product announcements.
Organization and Hierarchy
Pages can be organized in a hierarchical structure, allowing you to create parent and child pages. This feature is useful when you want to create a logical flow of information on your website. Posts, on the other hand, are organized using categories and tags. Categories help group related posts together, while tags provide more specific labels to further classify content.
Visibility and Accessibility
Pages are typically included in the main navigation menu of your website, making them easily accessible to visitors. They are meant to be prominent and readily available. On the other hand, posts are not automatically included in the navigation menu. Instead, they are usually accessed through the blog page or links within other posts.
Comments and Interactivity
By default, pages do not allow comments. They are intended for static information and don’t usually require user interaction. However, you can enable comments on pages if necessary. Posts, on the other hand, are designed to encourage user engagement and discussion. They have built-in comment functionality, allowing visitors to leave comments and interact with the content.
SEO and Permalinks
Pages and posts can have different permalink structures, which are the URLs that point to individual pages or posts on your website. By default, pages use a permalink structure that includes the page title, while posts use a structure that includes the date and post title. However, both pages and posts can have custom permalink structures that you can configure in the WordPress settings.
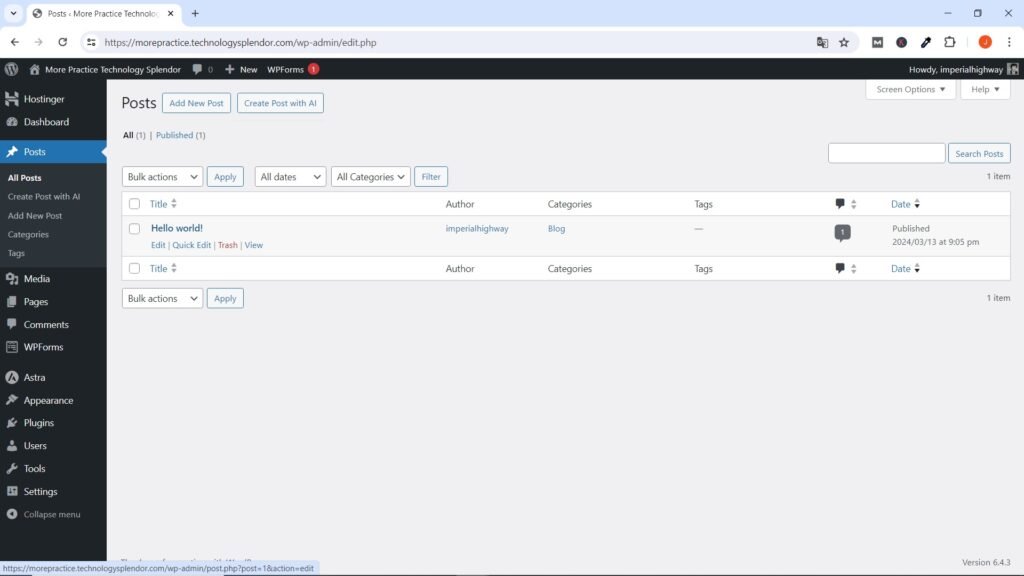
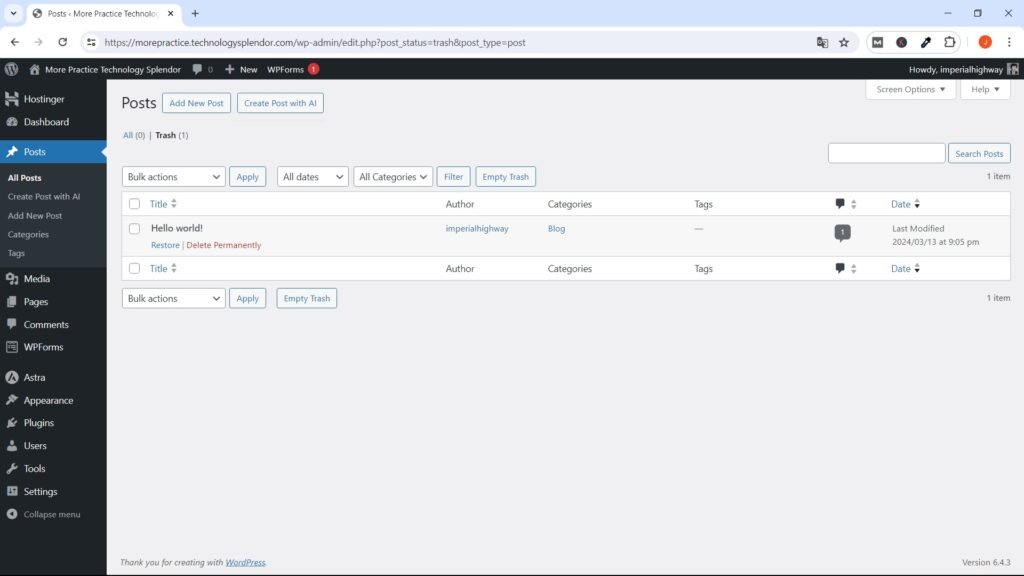
Deleting Default Pages and Posts in WordPress after Installation
Generally, most web hosting providers, when installing WordPress on your website, create at least one page and a sample post which you can delete without problem by going to the respective Pages and Posts Menus, taking them to the trash and then delete them permanently.
Artificial Intelligence (AI)
In the previous images we can see in the upper left corner the option “Create Post with AI”.
Most web hosting providers already include the option to create posts with Artificial Intelligence (AI). Unquestionably and undoubtedly, this is a great advance in Computer Science and Technology, however, we cannot take the information obtained in this way as 100% accurate, there may be errors and even more so if we were not clear enough and specific when requesting such information.
Of course it is an excellent tool and work aid that will save us time, money and effort but we cannot expect it to do everything, it is up to us to review, add, delete and/or modify the information obtained in this way. We insist, when you create a post with AI you have to specify very very clearly the information that you require it to provide you, the more details the better, remember that you are asking a machine not a human.
Pages Creation with WordPress Gutenberg
So far, you already know what the pages are, the posts and what their differences are, in addition to the fact that we have already finished installing WordPress, configuring some settings on your WordPress desktop, choosing and installing the theme and perhaps a plugin. We are perhaps impatient to write the content of our first pages and posts but first we have a mandatory reading of the meaning of Keywords, which are just that, keywords that people search for within their niche.
To discover these Keywords, you need to conduct keyword research for each individual page and content post right before creating it. We have to write content about what people are searching for, know the number of searches and the competence in the language and country or region of our interest. So before you start creating your first page, you have to read our article titled Keywords Power.
Now that you have configured the basic settings, installed the theme, basic plugins and have read our Keywords Power article very carefully, it is time to create the main pages of your website.
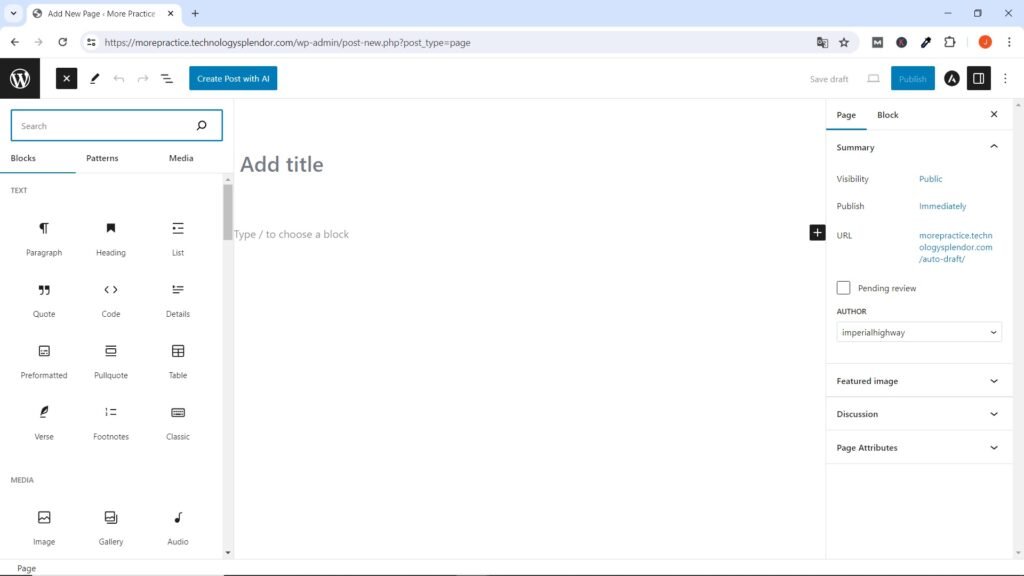
WordPress comes with a built-in editor called Gutenberg, which allows you to create and edit content using blocks. You can use Gutenberg to create pages such as the Home page, About us page, and legal pages (Privacy Policy, Terms & Conditions and Disclaimer). Simply go to the “Pages” menu in the admin dashboard, click on “Add New,” and start building your pages using the Gutenberg editor.

If you click the plus sign at the top left of the page builder window, a portion of the set of Gutenberg page editor blocks (such as headings, paragraphs, images, videos, etc.) built into WordPress appear by default.
Creation of Essential WordPress Pages
Neither the Legal nor the Contact pages of a Website have content that helps convert a user, you would never run a Marketing Campaign on any of these pages, so that is the reason why it is not necessary to index them (this it means that we do not need keyword research in this case but just create the pages and that’s it).
Let’s start by creating the fundamental pages that every website usually needs, such as “Home”, “About Us”, “Contact”, “Disclaimer”, “Terms and Conditions” and “Privacy Policy”. These pages provide basic information about your website and are key to navigation and user confidence. At first you can help yourself with the Policy Maker Website (which is a free generator of legal documents) to create the last 3 which are the legal pages. If your business grows a lot, you probably need the help of a lawyer.
Importance of Keywords
To create the About Us page and the main one, which is the Home page, the first step is to go to the Google Keyword Planner and enter the content topic of the page you are going to create. The tool will show you the volume of global monthly searches for the searched term or Keyword as well as other similar terms, the competition for that Keyword and its cost per click, among others.
Although there is no defined rule, since it depends on many factors, we are going to choose that keyword if we observe that it has a search range between 10,000 – 100,000, 100,000 – 1M and that the competition is Medium or Low, if it is High, it will be more difficult to position ourselves in search engines. Logically, if the search range is very low, 1000 or less, it means that people are not interested in that topic of your content and you should write content on other topics. That’s why it’s important to do Keyword Research BEFORE creating your pages and posts.
Most of the keywords in your list should be between 3 and 5 words. People who use longer keyword phrases know what they are looking for and will therefore convert at a significantly higher rate. These terms have much less competition than keywords that are 1-2 words long. It’s even possible for a new site to achieve high rankings for a long keyword phrase through limited marketing efforts and page optimizations.
WordPress Home Page Creation
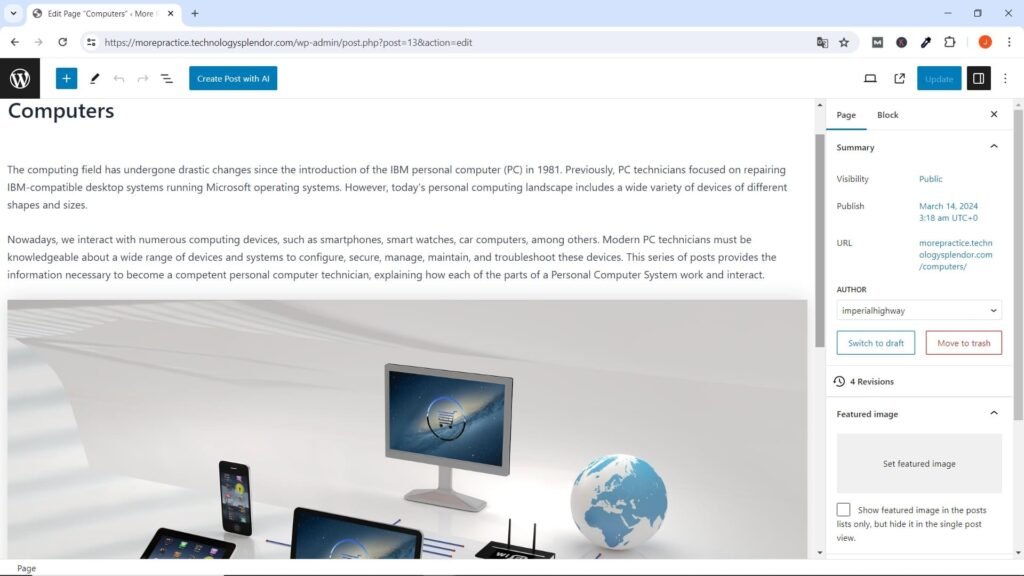
To create a new page or post, navigate to the “Pages” or “Posts” section in your dashboard and click “Add New.” Use the WordPress editor to add text, images, videos, and other media to your content.
Just as an example, let’s say your website focuses on the marketing of Assembled Computers and well-known brands. Perhaps the first thing that comes to mind is the word Computers, you go to the Google Keyword Planner and you find that this word has up to a million monthly searches but the Competition is High.
You continue the search and also find the words “Computer Store” with the same number of searches as Computers but with Medium Competition, finally you find the words “pc partpicker” coincidentally with the same number of searches but with Low Competition. It is your decision which of the last two options to choose, let’s suppose that your business focuses more towards Computer Assembly and therefore you choose the last option with Low Competition but a High number of Searches.
Gutenberg Editor Text Area
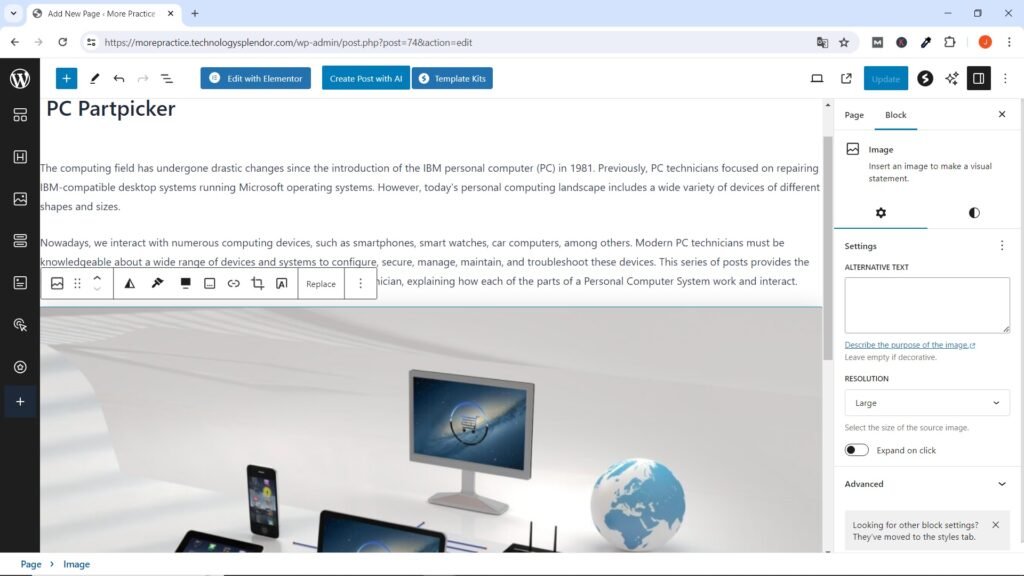
You can add the title of the page you are about to create (in this case, the home page titled “PC Partpicker”) exactly in the Add Title text area. Type the content of your page in the area below the Add Title field. The first time you visit the Edit Post screen, this area displays a message that says “Enter / to choose a block.” You can also add an image by clicking either of the two plus signs and adding an image block.
Click the Publish link, located in the upper right corner of the Edit Post screen. Click on the same link again. In WordPress, clicking “Publish” twice is often required due to security measures and to avoid accidental or unwanted publications since from this moment, your content will be available online.
Adding Content
Adding content to your WordPress pages is a straightforward process.
Using the Gutenberg Block Editor
Log In to Your WordPress Dashboard:
- Navigate to your WordPress login page (typically www.yoursite.com/wp-admin) and log in with your credentials.
Navigate to Pages:
- In the left-hand menu, click on “Pages” to view a list of your existing pages.
Add a New Page or Edit an Existing Page:
- To create a new page, click “Add New”.
- To edit an existing page, click the title of the page you want to edit.
Add Content Using Blocks:
- Gutenberg uses a block system to add and arrange content.
- Add a Block: Click the “+” icon to add a new block.
- Choose a Block Type: Select the type of block you want to add (paragraph, heading, image, gallery, list, etc.).
- Enter Content: Click inside the block to enter your content. Each block is an individual content element.
Customize and Arrange Blocks:
- You can move blocks up and down using the arrow icons that appear when you hover over the left side of a block.
- Customize each block’s settings by clicking on it and using the options available in the right-hand sidebar.
Add Media:
- To add images or other media, use the “Image” block or the “Media & Text” block.
- You can also upload files directly from your computer or select from the media library.
Save Your Changes:
- Once you’ve added and arranged your content, click “Save Draft” if you’re not ready to publish.
- Click “Publish” or “Update” to make the page live.
Using the Classic Editor (if Gutenberg is disabled)
Log In to Your WordPress Dashboard:
- Navigate to your WordPress login page and log in with your credentials.
Navigate to Pages:
- In the left-hand menu, click on “Pages” to view a list of your existing pages.
Add a New Page or Edit an Existing Page:
- To create a new page, click “Add New”.
- To edit an existing page, click the title of the page you want to edit.
Add Content Using the Classic Editor:
- Text Area: Use the text area to add and format your content. The toolbar above the text area provides options for formatting text, adding links, inserting media, and more.
- Add Media: Click the “Add Media” button above the text area to upload images or select from your media library.
Save Your Changes:
- Click “Save Draft” if you’re not ready to publish.
- Click “Publish” or “Update” to make the page live.
Using a Page Builder Plugin (like Elementor)
Log In to Your WordPress Dashboard:
- Navigate to your WordPress login page and log in with your credentials.
Install and Activate the Page Builder Plugin:
- If you haven’t already, go to “Plugins” > “Add New”, search for your preferred page builder (e.g., Elementor), install and activate it.
Navigate to Pages:
- In the left-hand menu, click on “Pages” to view a list of your existing pages.
Add a New Page or Edit an Existing Page:
- To create a new page, click “Add New”.
- To edit an existing page, click the title of the page you want to edit.
Edit with Elementor (or Your Chosen Page Builder):
- Click the “Edit with Elementor” button to open the page builder interface.
- Use the drag-and-drop interface to add elements such as text, images, videos, buttons, and more.
- Customize each element’s settings to match your design preferences.
Save Your Changes:
- Click “Save Draft” or “Publish” to save your changes and make the page live.
General Tips
- Preview Your Page: Before publishing, use the “Preview” button to see how your page will look on the front end.
- Responsive Design: Check how your page looks on different devices (desktop, tablet, mobile) and make adjustments as necessary.
- SEO Considerations: Use an SEO plugin like Yoast SEO to optimize your page’s content for search engines.
By following these steps, you can efficiently add and manage content on your WordPress pages using different editors and tools available within the platform.
Organizing Your Content
Effectively organizing your content is crucial for user experience and SEO. In the case of publications, use categories and tags to group those that are related. In the case of Pages, create a clear and intuitive menu to help visitors navigate your site. You can configure your menu in the “Appearance” section under “Menus” of the WordPress desktop.
What is the Blog Page in WordPress and How is it Created?
The Blog Page in WordPress is a designated page that displays your posts in reverse chronological order. It’s the section of your site where visitors can find your latest blog entries, news updates, or articles.
How to Create and Designate a Blog Page in WordPress
Create a Blog Page:
- Log In to Your WordPress Dashboard: Go to your WordPress login page and log in with your credentials.
- Navigate to Pages: Click on “Pages” in the left-hand menu.
- Add New Page: Click the “Add New” button.
- Title Your Page: Enter a title for your page, such as “Blog” or “News”.
- Publish the Page: Click the “Publish” button to create the page.
Designate the Blog Page:
- Navigate to Settings: After creating and publishing the Blog Page, return to the WordPress desktop and in the left-hand menu, go to “Settings” > “Reading”.
- Set the Homepage and Posts Page:
- Static Page Setting: Under the “Your homepage displays” section, select “A static page”.
- Homepage: Choose the page you want to set as your homepage from the “Homepage” dropdown menu.
- Posts Page: Choose the newly created “Blog” page from the “Posts page” dropdown menu.
- Set the Homepage and Posts Page:
- Save Changes: Click the “Save Changes” button at the bottom of the page.
How WordPress Knows It’s the Blog Page
When you designate a specific page as the “Posts page” in the Reading Settings, WordPress automatically understands that this is the page where it should display all your posts. Here’s how it works:
- Settings Configuration: The selection in the Reading Settings tells WordPress to pull all the posts data and display it on the chosen page.
- Template Usage: WordPress uses the appropriate theme template (usually
home.phporindex.php) to display the posts on this designated page.
- Dynamic Content: The Blog Page dynamically updates with new posts as you publish them, without needing to manually edit the page.
Practical Example:
- Homepage: You might have a static homepage that showcases your business, services, or featured content.
- Blog Page: Your “Blog” page will list all your blog posts, starting with the most recent, and visitors can click on individual posts to read the full content.
Benefits of Having a Designated Blog Page:
- Organization: Keeps your posts organized and separate from your static pages.
- User Experience: Provides a dedicated space for readers to find your latest updates and articles easily.
- SEO: Helps search engines index your blog content more effectively, improving your site’s search visibility.
Creating and designating a Blog Page in WordPress involves creating a new page, setting it as the posts page in the Reading Settings, and letting WordPress handle the rest. This separation of static and dynamic content enhances the organization, user experience, and SEO of your website.
What is the Difference between a Blog Page and a Post?
In no way should you confuse a Post with a Blog Page, they are very different things. The first is a Post and the second is a Page, but they are closely related to each other. The Blog Page acts as a container for your posts, providing an overview and easy navigation for your readers, while individual posts are the actual content pieces that provide information, tell stories, or share updates.
The main differences between a Blog Page and a Post in WordPress lie in their function, usage, and behavior within the website structure. Here’s a detailed explanation:
Blog Page
Definition:
- The Blog Page is a designated page on your WordPress site that aggregates and displays a list of your blog posts in reverse chronological order.
Purpose:
- Its primary purpose is to serve as a central location where visitors can browse through all the blog posts published on your site.
Content:
- The Blog Page itself does not contain content. Instead, it dynamically displays the content from individual posts.
Creation:
- Created as a standard WordPress page and then set as the “Posts page” in the Reading Settings of your WordPress dashboard.
Updates:
- Automatically updates to show new posts as they are published. You never have to worry about placing the latest posts first, the recent ones are automatically placed at the top and the oldest ones at the bottom.
Post
Definition:
- A Post is an individual article or entry that is published on your blog. It is a single piece of content that appears in the blog feed.
Purpose:
- Posts are used for publishing timely content such as news, articles, tutorials, or any other content that is updated regularly.
Content:
- Contains the actual content, including text, images, videos, and other media. Each post is a standalone entry.
Creation:
- Created by going to the Posts section in the WordPress dashboard and clicking “Add New”.
Updates:
- Posts can be edited and updated individually. They appear on the Blog Page based on their publication date.
Key Differences
Function:
- Blog Page: Aggregates and displays multiple posts.
- Post: Represents a single piece of content.
Content Source:
- Blog Page: Pulls content from multiple posts.
- Post: Contains its own unique content.
Creation Process:
- Blog Page: Created and set as a static page.
- Post: Created as individual entries within the Posts section.
Display and Updates:
- Blog Page: Updates automatically to include new posts.
- Post: Each post is published and updated individually.
Template Usage:
- Blog Page: Uses a general template to display a list of posts.
- Post: Uses a single post template for individual post views.
Practical Example
- Blog Page: Yoursite.com/blog — A page where all your blog posts are listed.
- Post: Yoursite.com/blog/my-first-post — A specific article on your blog, like “My First Post,” which appears on the Blog Page as part of the list.
Understanding the distinction between a Blog Page and a Post helps in effectively organizing and managing your website’s content.
WordPress Posts Creation
The steps for adding content to WordPress pages and posts are actually similar because they both use the same WordPress editor interfaces (Gutenberg Block Editor, Classic Editor, or a Page Builder plugin like Elementor).
However, as we mentioned above there are some key differences between pages and posts in terms of their purpose, use and features. Logically, in the WordPress desktop options menu, we must choose the “Posts” option instead of Pages.
If you want more design flexibility and advanced customization options, you can use a page builder plugin like Elementor which provides a drag-and-drop interface that allows you to create visually amazing pages without any coding knowledge. Install and activate the Elementor plugin and then use it to design your pages according to your preferences.
Building a WordPress website from scratch involves registering a domain name, acquiring web hosting, installing WordPress, configuring settings, choosing a theme, installing essential plugins, and creating the main pages. With the help of Gutenberg and Elementor, you can easily design and customize your website to meet your specific requirements.
If you automated Themes and Plugins updates you don’t have to worry about those actions actually being performed. As for WordPress updates, that is taken care of by the web hosting provider. All of the above guarantees optimal performance and security of the website.
Optimizing Images on WordPress: Formats, Sizes, and Performance Strategies
Without a doubt, Images play a crucial role in enhancing the visual appeal and engagement of WordPress websites. Understanding the accepted formats, sizes, and maximum space in kilobytes (KB) is essential for optimizing website performance and speed.
If you need to convert an image from one format to another accepted by WordPress, modify its size or compress it, you can use online image editors such as iloveimg, canva, pixlr, among many more.
Accepted Image Formats:
-
JPEG (Joint Photographic Experts Group):
- Ideal for photographs and images with many colors.
- Offers good compression with minimal loss of quality.
- Suitable for web use due to its smaller file size.
-
PNG (Portable Network Graphics):
- Supports transparency and high-quality graphics.
- Recommended for images with text, logos, or graphics with fewer colors.
- Larger file sizes compared to JPEG but maintains quality.
-
GIF (Graphics Interchange Format):
- Used for simple animations and graphics with limited colors.
- Limited to 256 colors, making it suitable for small icons or animations.
Image Size and Maximum Space:
-
Optimal Dimensions:
- Resize images to fit the intended display size on your website.
- For example, if your content width is 1200 pixels, resize images to around 1200 pixels wide for optimal display without distortion or loss of quality.
-
File Size:
- Aim for an average file size of 100 KB to 300 KB for large images and 30 KB to 100 KB for smaller images.
- Compress images using tools like TinyPNG, JPEGmini, or plugins like Smush to reduce file size without compromising quality.
-
Maximum Space:
- Many web hosting providers offer disk space limits for uploaded media.
- Check your hosting plan for the maximum allowed space and manage images accordingly to avoid exceeding limits and impacting website performance.
Importance of Optimizing Images:
-
Improved Loading Speed:
- Optimized images lead to faster page loading times, enhancing user experience and reducing bounce rates.
- Faster websites rank better in search engine results, improving SEO performance.
-
Bandwidth Efficiency:
- Smaller image sizes reduce bandwidth usage, especially important for mobile users with limited data plans.
-
Mobile Responsiveness:
- Optimized images contribute to a responsive design, ensuring compatibility across various devices and screen sizes.
By following these guidelines and best practices for image formats, sizes, and space limits, you can effectively optimize your WordPress website for better performance, speed, and user satisfaction.
Optimizing and Launching Your Website
Testing Your Website Before launching, thoroughly test your website to ensure everything functions correctly. Check your site on different devices and browsers to ensure it is responsive and performs well across various platforms. Test all links, forms, and interactive elements to ensure they work as intended.
Optimizing for SEO Implement SEO best practices to improve your site’s visibility on search engines. Use SEO plugins like Yoast SEO to optimize your content, set meta descriptions, and generate XML sitemaps. Ensure your site is fast and mobile-friendly, as these factors significantly impact your search engine rankings.
Launching Your Website Once you’re satisfied with your site, it’s time to launch. Announce your launch on social media, email newsletters, and other marketing channels to drive traffic to your new site. Continue to monitor your site’s performance and make adjustments as needed.
Maintaining Your Website
Regular Updates Keep WordPress, your theme, and plugins up to date to ensure security and functionality. Regular updates protect your site from vulnerabilities and provide new features and improvements.
Backups and Security Regularly back up your site to prevent data loss. Use security plugins to monitor and protect your site from threats. Implement strong passwords and user permissions to safeguard your site.
Ongoing Content Creation Keep your website fresh and engaging by regularly adding new content. Blog posts, news updates, and other dynamic content keep visitors returning to your site and improve your SEO.
Concluding Thoughts on the Power of WordPress
Building and launching your first impressive website with WordPress is a rewarding endeavor that provides you with complete control and flexibility.
Following and practically applying all the instructions and processes shown in this Post, you can create a spectacular, functional, and optimized website that effectively represents your brand and engages your audience.
Whether you’re a beginner or an experienced developer, WordPress offers the tools and resources you need to bring your vision to life.