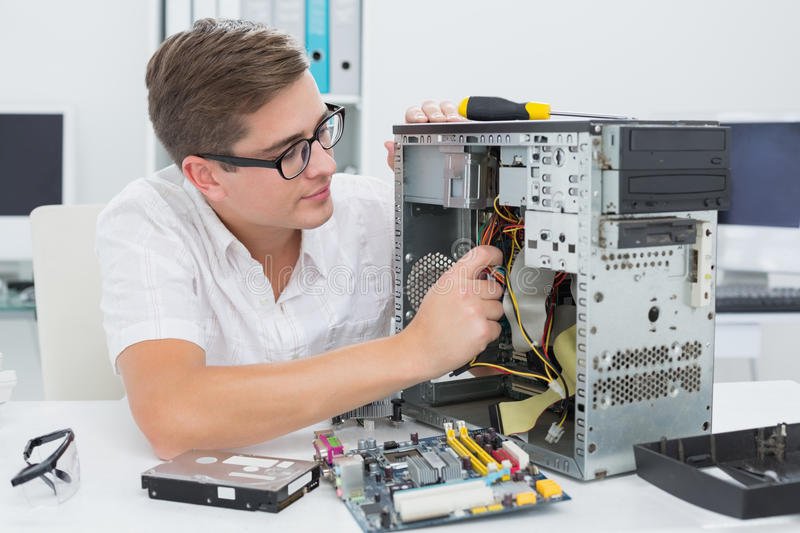
Discover step-by-step instructions, tips, tricks for building a PC from scratch by choosing the right components, maintenance tips, upgrades, and troubleshooting common problems.
It is crucial to choose the right components that will meet your needs and budget before you begin building a PC. There are several key components that you will need to consider, including the processor, motherboard, memory, storage, graphics card, power supply, and case.
Processor
Processor, or CPU, is the brain of your computer, and it determines the overall performance of your system. There are two main manufacturers to choose from: Intel and AMD. Each manufacturer offers a range of processors with different specifications, such as clock speed, number of cores, and cache size. It is important to research and compare different models to find the one that best suits your requirements.
Intel
AMD


Motherboard
Motherboard is the main circuit board that connects all the components of your PC. It provides the necessary slots and sockets for the processor, memory, storage, and other peripherals. When choosing a motherboard, you need to consider factors such as the socket type, chipset, form factor, and expansion slots. It is essential to ensure that the motherboard is compatible with the other components you plan to use in building a PC.


Memory (RAM)
Memory, or RAM, is responsible for storing and accessing data that the processor needs to perform tasks. The amount of memory you need depends on the type of applications you use. For basic tasks like web browsing and word processing, 8GB of RAM should be sufficient. However, if you plan to run demanding applications or play resource-intensive games, you may need 16GB or more.

Storage
Storage is where you store all your files, programs, and operating system. There are two main types of storage: hard disk drives (HDDs) and solid-state drives (SSDs). HDDs are slower but offer larger storage capacities at a lower cost, while SSDs are faster but have smaller capacities and are more expensive. It is common to use a combination of both, with an SSD for the operating system and frequently accessed files, and an HDD for mass storage.


Graphics Card
Graphics Card, or GPU, is responsible for rendering images and videos on your monitor. If you plan to use your PC for gaming or graphic-intensive tasks, you will need a dedicated graphics card. There are several manufacturers to choose from, including Nvidia and AMD. It is important to consider factors such as the GPU architecture, VRAM capacity, and power requirements when selecting a graphics card for building a PC.


Power Supply
Power supply unit (PSU) is responsible for supplying power to all the components of your PC. It is important to choose a PSU that can provide enough power for your system, taking into account the power requirements of the CPU, GPU, and other components. It is recommended to choose a PSU with a higher wattage than what your system requires to allow for future upgrades.

Case
Case is the enclosure that houses all the components for building a PC. It is important to choose a case that is compatible with the size of your motherboard and has enough space for all your components. Additionally, you may want to consider factors such as airflow, cable management, and aesthetics when selecting a case.

Building a PC (White Box)
Building your own PC has become increasingly popular in recent years, with the rise of what are commonly referred to as “white boxes”. These custom-built computers offer a range of advantages and disadvantages compared to pre-built PCs from recognized brands such as HP, Dell, and others. In this article, we will explore everything you need to know about building your own PC and examine the pros and cons of this DIY approach.
An advantage of building your own PC is the satisfaction and sense of accomplishment that comes with it. Assembling the components, connecting the cables, and troubleshooting any issues can be a rewarding experience for those who enjoy tinkering with technology. It allows you to gain a deeper understanding of how a computer works and provides a sense of ownership over your system.
However, building your own PC is not without its challenges. It requires a certain level of technical knowledge and expertise. If you are new to PC building, you may find yourself facing a steep learning curve. Understanding the compatibility between different components, troubleshooting hardware or software issues, and ensuring proper cooling and cable management can be daunting tasks for beginners.
Additionally, building your own PC can be time-consuming. Researching and selecting the right components, comparing prices, and waiting for the delivery of each part can take weeks or even months. This may not be ideal for those who need a new computer urgently or who simply prefer the convenience of purchasing a pre-built system.
What is Building a PC?
The first step in building a PC is to determine your specific requirements. Consider the tasks you will be performing on your computer, such as gaming, video editing, or office work. This will help you determine the necessary components, such as a powerful graphics card, ample storage space, or a high-speed processor.
Next, you will need to research and select the individual components that will make up your PC. This includes the motherboard, CPU, RAM, storage devices, graphics card, power supply, and cooling system. Each component plays a crucial role in the overall performance and functionality of your computer, so it is important to choose wisely.
Once you have gathered all the necessary components, it is time to assemble your PC. This process involves carefully connecting each component to the motherboard, securing them in the appropriate slots or sockets, and ensuring that all the connections are secure. While it may seem daunting at first, there are plenty of online tutorials and resources available to guide you through the process step by step.
Building a PC not only allows you to customize the hardware, but also gives you the freedom to choose the software that best suits your needs, for example the operating system, Linux or Windows. Building your own PC gives you the flexibility to make these choices.
In addition to the customization aspect, building your own PC can also be a cost-effective option. By purchasing individual components and assembling them yourself, you can often save money compared to buying a pre-built computer with similar specifications. This can be particularly beneficial if you are on a tight budget or if you want to allocate more funds towards specific components that are important to you.
Advantages and Disadvantages of Building a PC
While building your own PC can offer numerous advantages, such as customization and cost-effectiveness, it is important to consider the potential disadvantages. These include the need for technical knowledge, the time and effort required. By weighing these factors against your own preferences and needs, you can make an informed decision on whether building your own PC is the right choice for you.
Performance Optimization
When you build your own PC, you have the opportunity to optimize its performance to suit your specific needs. You can choose components that are known for their high performance and compatibility, ensuring that your PC runs smoothly and efficiently. Additionally, you have the freedom to overclock your processor or graphics card, pushing them beyond their default settings to achieve even better performance.
Quality Control
By building your own PC, you have complete control over the quality of the components you use. You can research and select reputable brands and manufacturers known for their reliability and durability. This allows you to build a PC that is built to last, minimizing the risk of hardware failures or compatibility issues that can arise with pre-built systems.
Pride and Satisfaction
As we mentioned above, there is a sense of pride and satisfaction that comes with building your own PC. It is a project that requires time, effort, and attention to detail. When you successfully assemble all the components and power on your PC for the first time, it can be an incredibly rewarding experience. Knowing that you have created something functional and tailored to your needs can give you a sense of accomplishment and pride.
Future-Proofing
Building your own PC allows you to future-proof your system. By selecting the latest components and technologies, you can ensure that your PC is capable of handling future software advancements and requirements. This means that you won’t have to upgrade your entire system as frequently, saving you both time and money in the long run.
Overall, building your own PC offers numerous advantages, from customization and cost-effectiveness to learning opportunities and performance optimization. It is a rewarding endeavor that allows you to create a computer that is tailored to your specific needs and preferences. Whether you are a gaming enthusiast, a content creator, or simply someone who wants full control over their technology, building your own PC is a worthwhile and empowering experience.
Cost
Although as we mentioned above, you can get savings by building your own PC yourself, and this is an advantage, but it can also become a disadvantage. While it is true that building your own PC can often be more cost-effective than buying a pre-built one, there are certain factors to consider. Firstly, if you are not experienced in selecting components, you may end up spending more money on unnecessary or incompatible parts. Additionally, if you encounter any issues during the assembly process, you may need to purchase additional tools or replacement parts, adding to the overall cost.
Furthermore, building your own PC requires you to invest time and effort into researching and comparing prices for each component. This can be a time-consuming process, and if you are not careful, you may end up overspending on certain components or missing out on potential discounts or deals.
Learning Opportunity
Building your own PC can be a valuable learning experience for individuals interested in technology and computers. The process of researching, selecting, and assembling components provides hands-on knowledge of computer hardware and how different parts work together. This knowledge can be useful in troubleshooting and maintaining the computer in the future, as well as in understanding the underlying technology behind other electronic devices.
Furthermore, building your own PC can be a rewarding and satisfying endeavor. The sense of accomplishment that comes from building a functional computer from scratch can boost confidence and inspire further exploration of technology-related hobbies and interests.
While assembled PCs do have some disadvantages, such as the need for technical expertise, they offer numerous advantages in terms of customizability, flexibility, cost savings, and learning opportunities. For individuals who are willing to invest the time and effort, building their own PC can result in a high-performance computer that is perfectly suited to their needs and preferences.
Lack of Convenience
While building your own PC can be a rewarding experience for some, it may not be the most convenient option for everyone. If you are someone who values convenience and prefers a hassle-free solution, purchasing a pre-built PC may be a better choice. With a pre-built PC, you can simply order it online or purchase it from a store, and it will come ready to use out of the box. This is especially beneficial for individuals who may not have the time or technical knowledge to build their own PC.
Additionally, building your own PC requires you to take on the responsibility of troubleshooting and maintaining the system. This means that if any issues arise, you will need to spend time diagnosing and fixing them yourself. On the other hand, with a pre-built PC, you can rely on the manufacturer’s customer support and warranty to handle any technical difficulties, saving you time and effort.
Building a PC from Scratch: Step-by-Step Guide
As we have already mentioned, building a PC from scratch can be an incredibly rewarding experience, allowing you to customize your computer to meet your specific needs while also saving money. This comprehensive guide will walk you through each step of the process, from selecting the right components to assembling and configuring your PC.
I. Why Build Your Own PC?
- Customization: Tailor your PC to your specific needs, whether for gaming, video editing, or general use.
- Cost Efficiency: Save money by choosing components that fit your budget and needs.
- Upgradability: Easier to upgrade individual components over time compared to pre-built systems.
- Learning Experience: Gain valuable knowledge about computer hardware and troubleshooting.
II. Planning Your Build
- Determine Your Needs: Understand what you need the PC: for gaming, productivity, multimedia editing, etc.
- Set a Budget: Define how much you’re willing to spend on the build.
- Research: Look up the latest hardware trends and reviews to find the best components within your budget.
III. Choosing the Right Components
CPU (Central Processing Unit)
- The brain of your PC, crucial for overall performance.
- Intel vs. AMD; consider cores, threads, and clock speed.
GPU (Graphics Processing Unit)
- Vital for gaming and graphic-intensive tasks.
- NVIDIA vs. AMD; It is important to consider factors such as the GPU architecture, VRAM capacity, and power requirements
Motherboard
- You need to consider factors such as the socket type, chipset, form factor, and expansion slots. It is essential to ensure that the motherboard is compatible with the other components you plan to use in building a PC.
RAM (Random Access Memory)
- Affects system speed and multitasking capability.
- At least 8GB for basic use, 16GB for gaming, 32GB+ for heavy multitasking or professional work.
Storage
- SSDs for speed, HDDs for capacity; NVMe SSDs offer the best performance.
- Choose based on your storage needs; consider a combination of SSD (for OS and important programs) and HDD (for bulk storage).
Power Supply Unit (PSU)
- Powers all components; must be reliable.
- Ensure sufficient wattage for your build; look for efficiency ratings (e.g., 80 Plus Bronze).
- It is recommended to choose a Power Supply with a higher wattage than what your system requires to allow for future upgrades.
Case
- It is important to choose a case that is compatible with the size of your motherboard (ATX, Micro-ATX, Mini-ITX) and has enough space for all your components.
- Good airflow (cooling) is crucial; consider cases with multiple fan mounts and good cable management.
Cooling System
- Air cooling vs. liquid cooling; necessary to keep CPU/GPU temperatures down.
- Stock coolers (often included with CPUs) or aftermarket coolers for better performance.
IV. Assembling Your PC
- Tools Needed: Screwdriver, anti-static wrist strap, thermal paste (if not pre-applied), zip ties for cable management.
- Step-by-Step Assembly:
1. Prepare Your Workspace:
Choose a clean, well-lit, and spacious area to work in. Use an anti-static wrist strap to ground yourself and prevent static electricity from damaging components.
2. Install CPU:
- Remove the CPU socket cover on the motherboard.
- Align the CPU with the socket and gently place it in, ensuring proper orientation.
- Close the socket cover and secure it in place.
3. Install the CPU Cooler:
- Apply thermal paste on the CPU (if not pre-applied).
- Attach the CPU cooler according to the manufacturer’s instructions, ensuring a secure fit.
- Connect the cooler’s fan to the CPU fan header on the motherboard.
4. Install RAM:
- Unlock the RAM slots on the motherboard.
- Insert the RAM sticks into the slots, aligning the notch on the stick with the slot.
- Press down firmly until the clips on the sides snap into place.
5. Mount the Motherboard:
- Open the case by removing the side panels.
- Ensure there are no loose parts or cables inside the case.
- Snap the I/O shield (comes with the motherboard) into the back of the case. Ensure it is properly aligned and securely in place.
- Check the alignment of the standoffs inside the case to match the screw holes on the motherboard.
- Install any additional standoffs if needed, ensuring they correspond to the motherboard’s screw holes.
- Carefully position the motherboard inside the case, aligning it with the I/O shield and standoffs.
- Ensure the motherboard’s ports fit correctly into the I/O shield.
- Use the provided screws to secure the motherboard to the standoffs. Do not overtighten; just ensure the motherboard is firmly in place.
- Attach the 24-pin ATX power connector to the motherboard.
- Connect the 8-pin (or 4-pin) CPU power connector near the CPU socket.
- Attach the front panel connectors (power switch, reset switch, power LED, HDD LED) to the corresponding headers on the motherboard.
- Connect front USB, audio, and other ports as necessary.
- Double-check all connections to ensure everything is securely connected and properly aligned.
6. Install Storage:
Mount SSDs and/or HDDs in their respective bays.
7. Connect Components:
Attach all necessary power and data cables (e.g., motherboard power, CPU power, storage cables).
8. Install GPU:
Slot the graphics card into the PCIe slot and secure it.
9. Cable Management:
- Route cables neatly behind the motherboard tray and use cable ties or clips to secure them.
- Ensure good airflow within the case by avoiding cable clutter.
10. Close the Case:
- Replace the side panels of the case.
- Secure the panels with screws.
11. Connect Peripherals:
- Connect monitor cables, keyboard, mouse, and other peripherals.
- Double-check all connections and components for any loose parts.
- Power on the PC.
- If after turning on the PC, it does not start, follow the procedure shown below in this article.
Tips and Recommendations:
- Read the manuals: Refer to the manuals of each component for specific installation instructions.
- Handle components carefully: Avoid touching sensitive parts like CPU pins and GPU connectors.
- Use proper tools: Use a screwdriver with magnetic tips for easy handling of screws.
- Test outside the case: Consider testing the components outside the case before final assembly.
- Stay organized: Keep track of screws and cables to avoid misplacements during assembly.
- Research and seek help: If unsure, research online guides or seek assistance from experienced builders or forums.
Following these steps and recommendations will help ensure a smooth and successful PC build, allowing you to enjoy a custom-built computer tailored to your needs.
V. First Boot and BIOS Configuration
- First Boot: Power on the system to ensure all components are working.
- BIOS/UEFI Setup: Update BIOS if necessary, configure boot order, and ensure all hardware is detected.
Once your PC has successfully booted up, you will need to enter the BIOS setup. The BIOS (Basic Input/Output System) is a firmware interface that allows you to configure various settings on your motherboard. Use the arrow keys on your keyboard to navigate through the BIOS menus and make any necessary changes. This may include setting the boot order, enabling or disabling certain features, and adjusting the system clock.
VI. Installing the Operating System and Drivers
With the BIOS setup complete, it’s time to install the operating system (Windows, Linux or other OS). Insert the installation media, such as a USB drive or DVD, into your PC. Restart the system and follow the on-screen instructions to install the OS. You may need to format and partition your storage drives during the installation process.
Once the operating system is installed, you will need to install the necessary drivers for your hardware components. These drivers allow your operating system to communicate with and utilize the full capabilities of your hardware. Visit the manufacturer’s website for each component and download the latest drivers. Install them one by one, following the provided instructions.
VII. Software and Updates
After installing the drivers, it’s time to install any additional software you may need. This could include productivity tools, media players, or games. Be sure to also install any available updates for your operating system and software to ensure optimal performance and security.
VIII. Testing and Troubleshooting
Once your PC is up and running with all the necessary software, it’s a good idea to test its performance and stability. Run benchmarking software to assess the capabilities of your hardware and ensure everything is functioning as expected. If you encounter any issues or errors, consult the troubleshooting guides provided by the component manufacturers or seek assistance from online forums and communities.
IX. Maintenance and Upgrades
Building a PC is not just a one-time task. Regular maintenance is required to keep your system running smoothly. This includes cleaning dust from the components, updating drivers and software, and monitoring temperatures and performance. Additionally, as technology advances and your needs change, you may want to consider upgrading certain components such as the CPU, RAM, or graphics card to improve your PC’s speed and capabilities.
X. Customizing Settings
Once you have installed the necessary drivers and software, it’s time to customize your PC’s settings to suit your needs. This includes adjusting display settings, setting up network connections, configuring power options, and personalizing the desktop background and theme.
Display Settings
To optimize your display, you can adjust the screen resolution, brightness, and color calibration. This will ensure that images and text appear crisp and clear on your monitor. You can also set up multiple monitors if you have more than one display connected to your PC.
Network Connections
If you’re using a wired connection, you may need to configure your network settings, such as setting up a static IP address or configuring a proxy server. If you’re using a wireless connection, you’ll need to connect to your Wi-Fi network and enter the password if required.
Power Options
Configuring power options allows you to choose how your PC behaves when it’s idle or when you press the power button. You can adjust settings such as sleep mode, hibernate, and screen timeout to conserve energy or prioritize performance.
Personalization
Make your PC feel more like your own by personalizing it. You can change the desktop background, choose a theme, and customize the appearance of icons and taskbars. You can also set up user accounts and configure privacy settings to ensure your data is protected.
XI. Backup and Security
To protect your data and ensure its safety, it’s important to set up regular backups and implement security measures. This includes creating system restore points, scheduling automatic backups to an external drive or cloud storage, and installing a reliable antivirus software.
System Restore Points
Creating system restore points allows you to revert your PC back to a previous state if any issues arise. This can be particularly useful if you encounter software conflicts or if your system becomes unstable after installing new software or drivers.
Backup Solutions
Setting up regular backups is crucial to protect your important files and documents. You can use built-in backup tools in your operating system or opt for third-party backup software. It’s recommended to have both local backups on an external drive and off-site backups in the cloud for added security.
Antivirus Software
Installing a reputable antivirus software is essential to protect your PC from malware, viruses, and other online threats. Ensure that the antivirus software is regularly updated to detect and remove the latest threats. Additionally, consider enabling a firewall to further enhance your PC’s security.
Building a PC from scratch is a rewarding process that offers numerous benefits, from cost savings to a deeper understanding of computer hardware.
By following the steps of this comprehensive guide, you can confidently assemble a custom PC tailored to your needs, you can configure it to your liking and ensure that it is running smoothly and securely.
Remember to regularly update your software, drivers, and antivirus program to keep your PC protected and optimized for performance.
What to do if your System Doesn't Boot after Building a PC?
If your PC does not boot after assembly, here are some troubleshooting steps you can follow:
1. Check Power Connections:
- Ensure that the power supply unit (PSU) is properly connected to the motherboard, CPU, GPU, and other components.
- Verify that the power switch on the PSU is turned on.
- Check if the power cable is securely plugged into the wall outlet.
2. Inspect Components:
- Double-check that all components, such as RAM sticks, GPU, and CPU, are properly seated and secured in their respective slots.
- Ensure that all cables and connectors are firmly attached and not loose.
3. Reset CMOS:
- Turn off the PC and disconnect the power cable.
- Locate the CMOS battery on the motherboard (usually a round, silver battery).
- Remove the CMOS battery for a few seconds and then reinsert it.
- Reconnect the power cable and try booting again.
4. Check Display Connections:
- Ensure that the monitor is properly connected to the GPU or motherboard (depending on whether you’re using integrated graphics).
- Try using a different display cable or port to rule out any issues with the connection.
5. Test Individual Components:
- Remove any unnecessary components (e.g., additional RAM sticks, extra storage drives) and try booting with the minimum required components (CPU, one RAM stick, GPU).
- If possible, test individual components (RAM sticks, GPU) in another system to check for faulty hardware.
6. Listen for Beep Codes or LED Indicators:
Some motherboards have built-in beep codes or LED indicators that can help diagnose hardware issues. Refer to your motherboard manual for details on interpreting these codes.
7. Check BIOS Settings:
Enter the BIOS/UEFI setup (usually by pressing a key like F2, Del, or Esc during boot) and verify that all settings are configured correctly, such as boot order, CPU settings, and memory settings.
8. Update BIOS/UEFI:
If your motherboard supports it, consider updating the BIOS/UEFI firmware to the latest version. Check the manufacturer’s website for instructions and downloads.
9. Test Power Supply:
- If possible, test the PSU with a PSU tester or multimeter to ensure that it is providing the correct voltages to the components.
- Swap the PSU with a known-working one to see if the issue persists.
10. Check for Overheating:
- Make sure that all fans are spinning properly and that there is adequate airflow within the case.
- Check CPU and GPU temperatures in the BIOS/UEFI or using software tools like HWMonitor or MSI Afterburner.
11. Consult Technical Support:
If you’re unable to diagnose the issue on your own, consider contacting technical support for assistance. Provide them with details about your PC build and the troubleshooting steps you’ve already taken.
By following these steps, you can troubleshoot and hopefully resolve the issue preventing your PC from booting.