Everything you need to know about installing and upgrading Windows. The installation and upgrade processes of this operating system are critical for maintaining a stable, secure, and up-to-date operating system.
Windows is a widely-used Operating System (OS) developed by Microsoft Corporation. It dominates the PC market and has evolved through numerous versions over the years. Was first introduced in 1985 with the version 1.0, which featured a graphical user interface (GUI) and ran on top of MS-DOS. Since then, Microsoft has released multiple versions, including Windows 95, XP, 7, 8, 10, and the latest, Windows 11 and editions such as Home, Pro and Enterprise.
The use of this operating systems on desktop computers, laptops and servers worldwide varies depending on the source and methodology used to collect the data. However, according to operating system usage statistics from sources such as StatCounter, Microsoft’s Windows remains the most widely used operating system on computers globally, with a market share that generally exceeds 70%. For this reason, it is very important to acquire the skills of Installation and Update of this Operating System
It is important to note that these figures may vary over time and may differ between different geographic regions and device types. Additionally, the growth of other operating systems, such as Apple’s macOS and various Linux distributions, is gradually affecting Windows’ market share, especially in certain segments such as professional users and developers.
Windows Installation
In its most basic form, a Windows installation consists of two steps. First, boot the system from the operating system installation media. Second, answer the installation wizard’s initial queries and allow it to do its job. At the end of the 20 to 40 minute process, you will see a welcome screen and are ready to start working with your PC.
Windows offers a surprising number of boot methods, giving you plenty of options to get the process started. The most common way to get started, at least historically, is to insert a Windows installation DVD, change the boot order in the system setup utility, and boot the system. Nowadays we normally boot from a drive inserted into a USB port. That includes flash drives or external drives.
Windows Installation Types
You can install Windows in several ways. A clean installation of an operating system involves installing it on an empty hard drive or completely replacing an existing installation. An upgrade installation means installing an operating system on top of a previous installed version, thereby inheriting all previous hardware and software configurations.
Clean Install
A clean installation means that your installation ignores a previous Windows installation, removing the old version as the new version of Windows is installed. A clean installation is also performed on a new system with a completely blank mass storage drive.
The advantage of performing a clean installation is that problems from the old operating system are not carried over to the new one. The downside is that you need to backup and then restore all your data, reinstall all your apps, and reconfigure the desktop and each app based on user preferences.
Typically, you perform a clean installation by configuring CMOS to boot from the optical drive or USB before the hard drive or SSD. It then boots from a Windows installation disk/drive and Windows gives you the opportunity to partition and format the hard drive or SSD during the installation process.
Upgrade Installation
For decades, if you wanted to take advantage of a new version of some operating system, you had to obtain (usually purchase) the new version and go through a process called an upgrade installation. You may find yourself in a situation where you need to upgrade an older version of Windows to Windows 10 or 11, so let’s talk about an upgrade installation.
In an upgrade installation, the new operating system is installed in the same folders as the old one or, in technical terms, the new one is installed on top of the old one. The new operating system replaces the old one, but retains data and applications and also inherits all personal settings (such as font styles, desktop themes, etc.). The best part is that there is no need to reinstall existing programs on your computer. The figure shows the start of the Windows 10 installation and asks if you want an upgrade installation.

Before starting a Windows update, always back up all user data files, do not skip this step. You should also make sure that the apps and drivers are compatible. Naturally, you should double-check to make sure your hardware is compatible with the version of Windows you’re installing.
To start Windows update, you need to run the appropriate program from the optical disk or USB drive. Typically, this means inserting a Windows installation USB or optical disk into your system while your old operating system is running, which automatically starts the setup program. The installation program will ask you if you want to perform an update or a new installation; If you select a new installation, the program will remove the existing operating system before installing the new one, so be careful!
Windows Installation Process
At the most basic level, installing any operating system follows a standard set of steps. Turn on the computer, insert an operating system disk into the optical drive or USB port, or access the media in some other way, and follow the installation wizard until everything is complete.
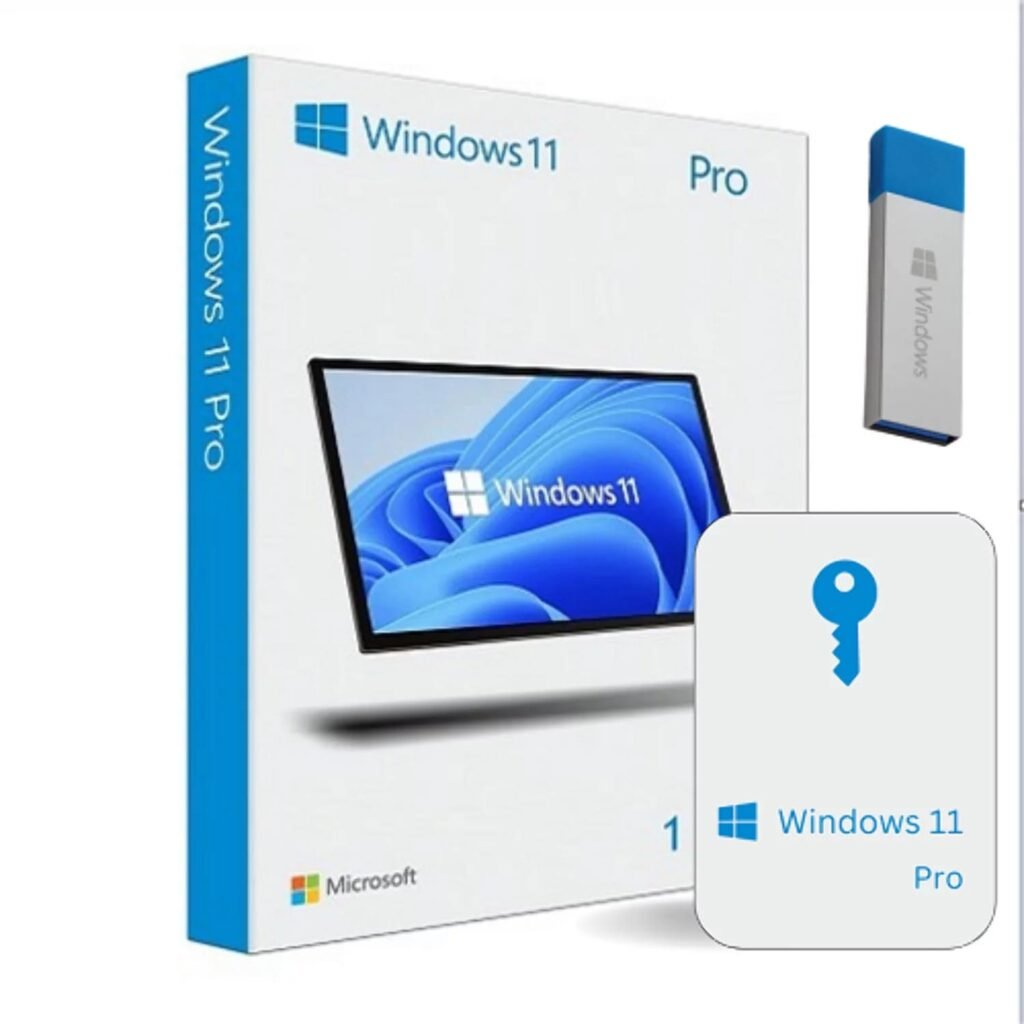
Along the way, you will accept the end user license agreement, the terms and conditions for using the operating system, and enter the product key that says you are not a pirate. The product key is always located on the installation disk box or USB package.
Clean Install Process
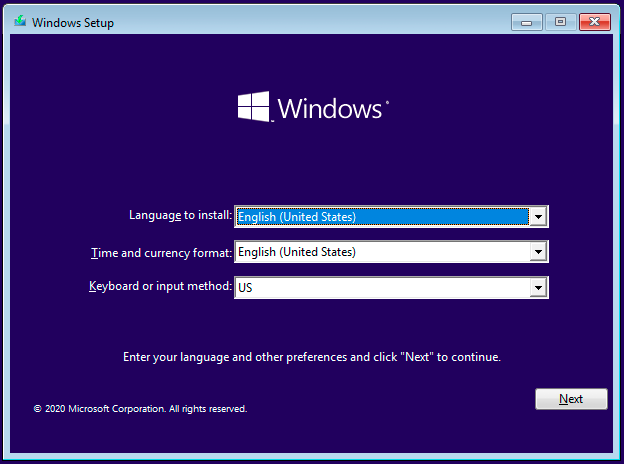
Once you have launched the installer, Windows will prompt you for language, time, currency, and keyboard settings, sometimes called local settings. Click Next to continue.
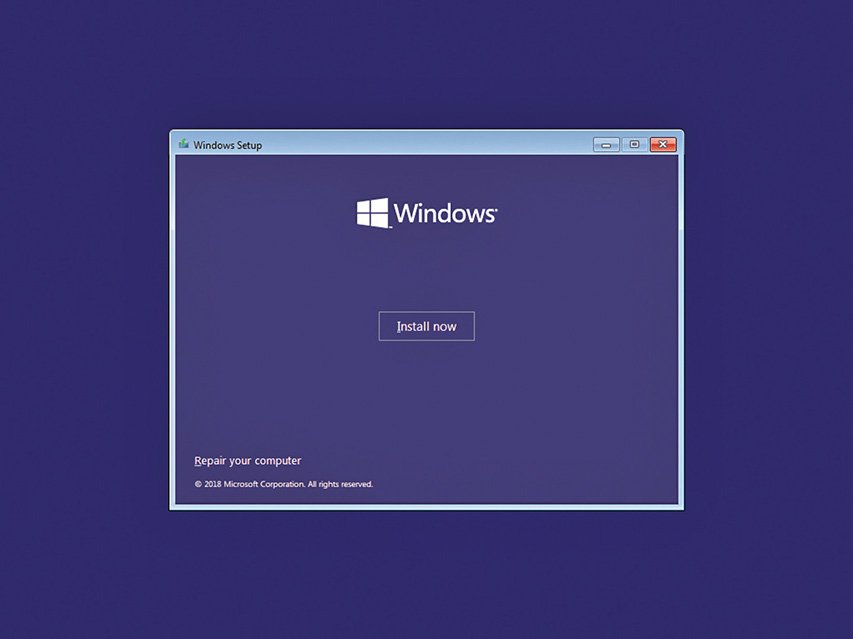
The next screen starts the installation process, but look at the bottom left corner. This screen also allows you to launch the installation disk repair tools (explained in detail in a separate post), but for now as you are just installing Windows, click Install now.
The next screen prompts you to enter your product key before you do anything else, as you can see in figure. The product key comes with the installation media. You should never lose it.
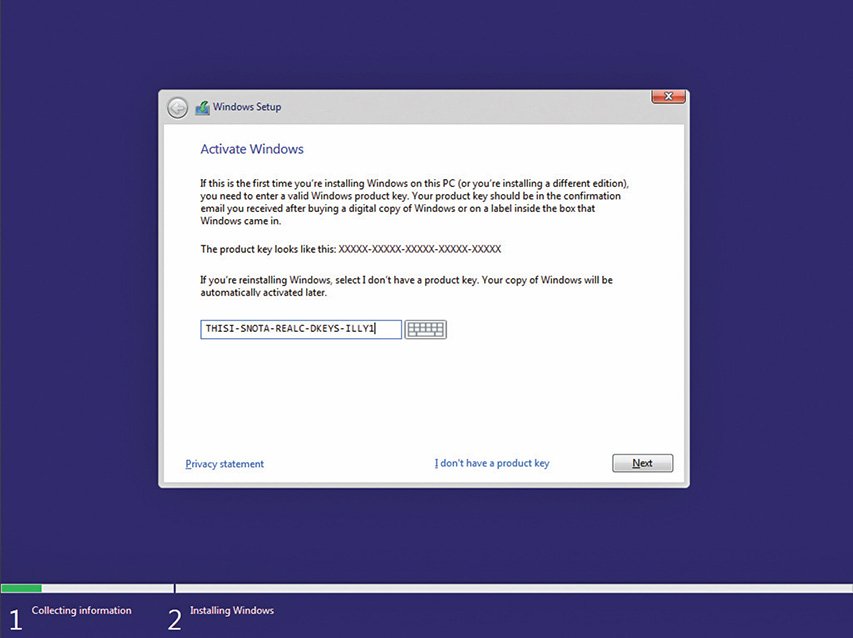
Every Windows installation disk contains all of the available editions within a version. The product key not only verifies the legitimacy of your purchase; it also tells the installer which edition you purchased.
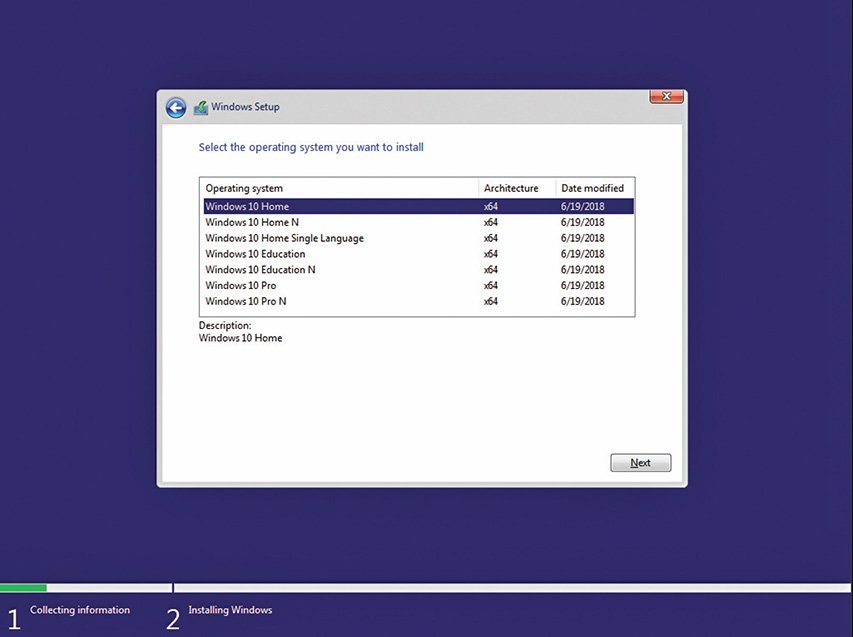
If you click the I don’t have a product key link, you will be taken to a screen asking you which version of Windows you would like to install.
The above does not mean in any way that you are going to install Windows without paying for it, you should know that doing so simply installs a 30-day trial of the operating system. After 30 days, you will no longer be able to boot from the desktop without entering a valid product key that matches the edition of Windows you installed.
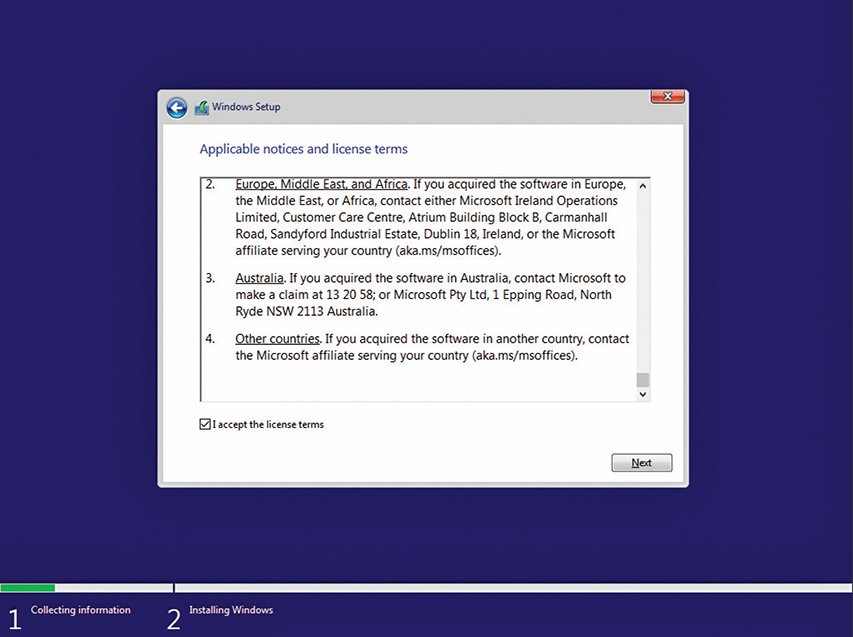
After entering the product key and clicking Next, you will find the Microsoft End User License Agreement. You must accept the license terms and click Next to continue.
Choosing type of Installation
On the next page, you will be able to decide whether you want to perform an upgrade installation or a clean installation. Windows calls a clean installation a custom installation. This option allows customization of various elements, such as partitions.

Now we show you how you can partition your hard drive and choose a destination partition for Windows. From this screen, you can click the New link to display a variety of partition options.

Once you’ve partitioned the drives and selected a partition to install Windows on, the installation process takes over, copying files, expanding files, installing features, and generally doing a lot of computing stuff.
This process can take several minutes (depending on factors such as hardware in general and whether you have a HDD or SSD installed in particular) so you must be patient and wait since it is not recommended that you walk away, you must be aware of the process.
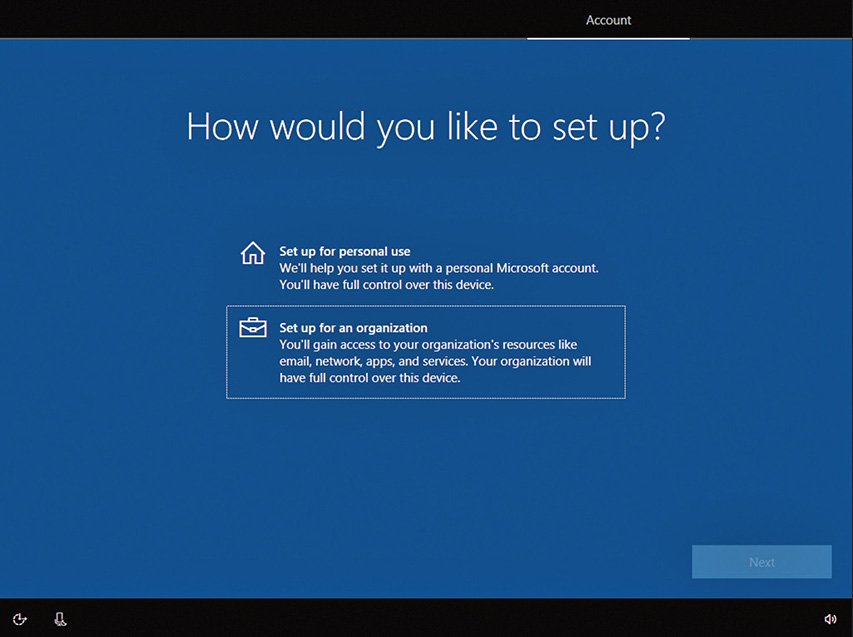
When Windows has finished unpacking and installing, it turns on the oh-so-irritating Cortana to “help” you finish the installation. You also have to choose between personal use or organization.
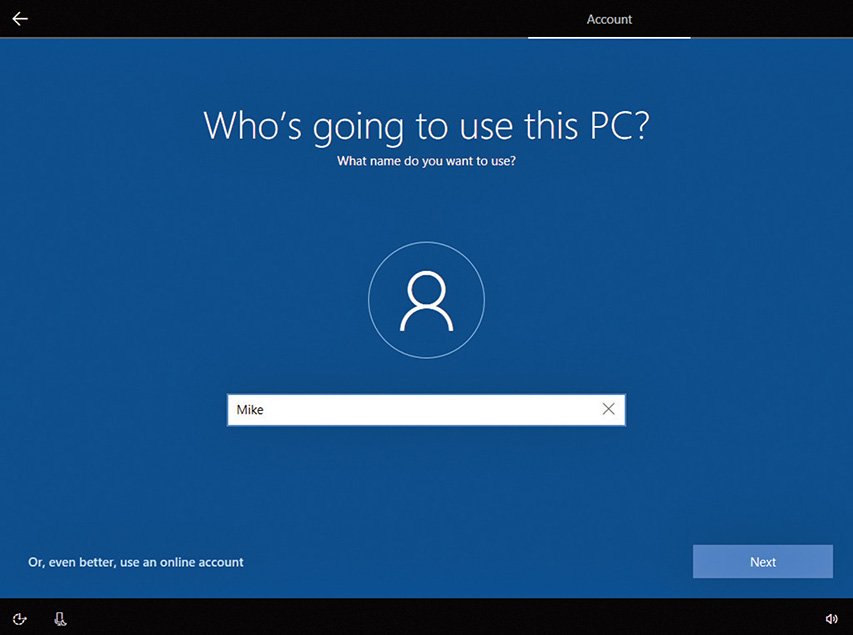
The next screen asks you to set up a username and password for your primary user account. All operating systems require the creation of this account. Cortana asks you to choose a username and tries to open a Microsoft account if you don’t already have one. You can do without this Microsoft account and simply create a normal local one on the computer. Choose the option that best suits your needs.
Choosing Privacy Settings
Microsoft also adds another setup feature at this point, privacy settings. Turning off everything on this screen still doesn’t stop Microsoft from taking a certain amount of information.

Activation is required, but you can skip this step during installation. You have 30 days to activate the product, during which time it will function normally. If you do not activate it within that time period, the operating system will be labeled as non-genuine and will not receive updates.
Don’t worry about forgetting it, though, because once installed, Windows frequently reminds you to activate it with a balloon message above the tray area of the taskbar. The messages even tell you how many days you have left.
Once you’re past the privacy settings screen, Windows gets to work installing it and warns you that it may take some time and that you shouldn’t shut down your PC.

Once the Windows installation process is complete, continue installing device drivers for hardware components such as graphics, sound, and network adapters to ensure proper functioning of your computer, as well as installing any programs that you will use such as word processors, spreadsheets, games, etc. Follow more detailed instructions about this process, following the steps from the 13 to 18 of the post Building a PC.